How to create in Blender a 3D model for milling based on a bitmap image.
3D milling can be done based on a bitmap image instead of a ready 3D model. This method is based on a color map of the bitmap, which is converted into a heightmap for milling. Light color parts of a bitmap lay over than dark parts. The minimum depth of milling is determined by white color, the maximum depth by black color.
In such a way it is possible to prepare g-code for milling using a bitmap image.
The most simple way - to use one of online resources for convertation of bitmap image into 3D model or ready g-code. But such ready services offer minimum adjustability of an output file.
One of such examples - . This service lets convert an image into a 3D model (STL format). In the section "image" should be uploaded the source bitmap image file, in the section "Settings" it is possible to set some adjustments, in the section "model" - to see and download the ready 3D model.
The readySTL 3D model should be imported in BlenderCAM, when prepare g-code for milling as it is described in the article "Usage of 3D printer SkyOne as a 3D milling machine".
But if more flexible adjustments are necessary, it is possible to create a 3D model from a bitmap image by usage of Blender software.
How to create a 3D model from a bitmap image in Blender
To create a 3D model from a bitmap image it is better to use classic Blender, because BlenderCam modifies the user interface.
- As the program Blender is launched, the only object cube appears in the work window. Delete this object.
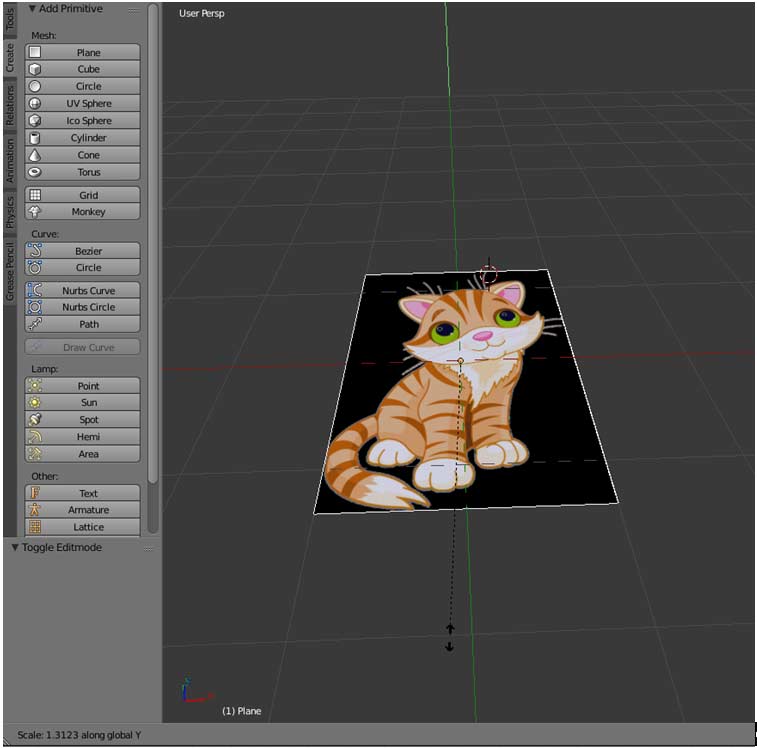
- Insert a new object - a plane - instead of the cube. To do it select a plane at the T-panel on the "Create" tab. A new plane will appear at the 3D cursor coordinates.
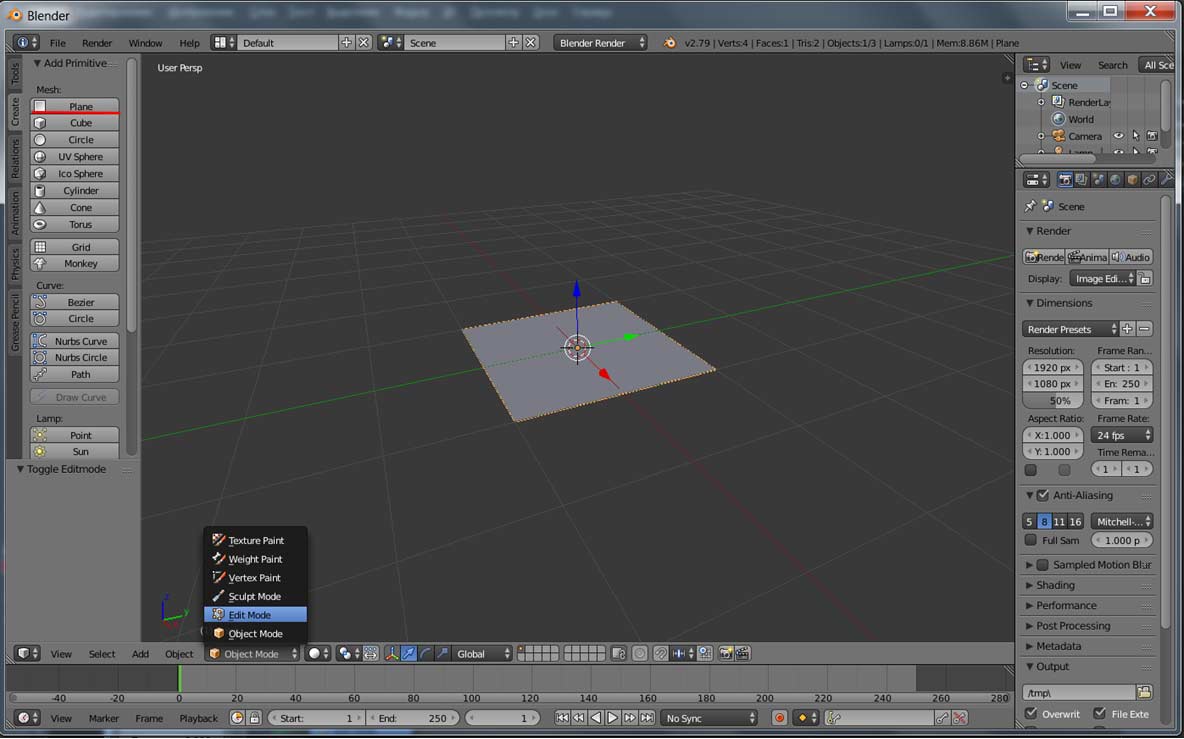
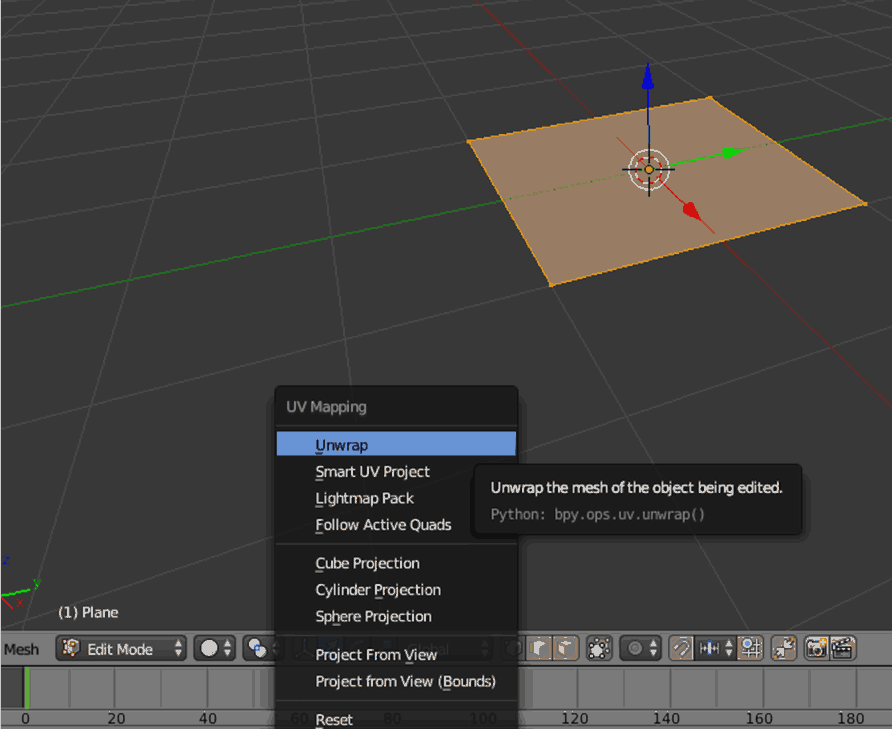
- Make a flat pattern. To do it select the plane (if it is not yet selected), change to edit mode, press the hotkey "u" on the keyboard and select menu "unwrap".
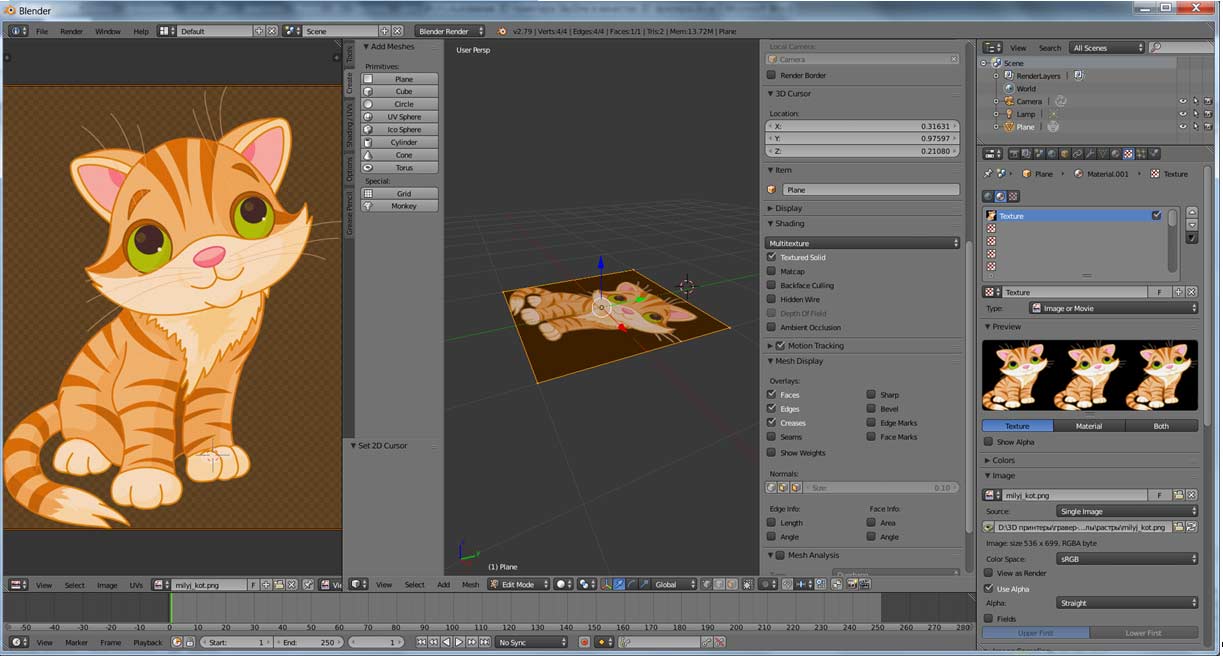
- Apply the image on the flat pattern. To do it:
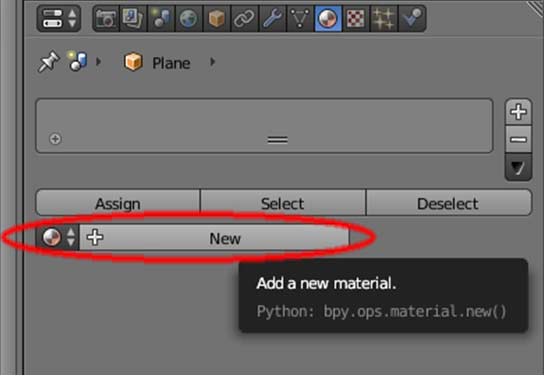
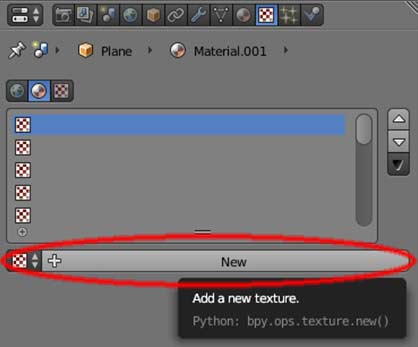
- Select the tab "material"
and add a new one - press "new".

- Select the tab "texture"
and add a new one - press "new". The structure type is "Image or Movie".

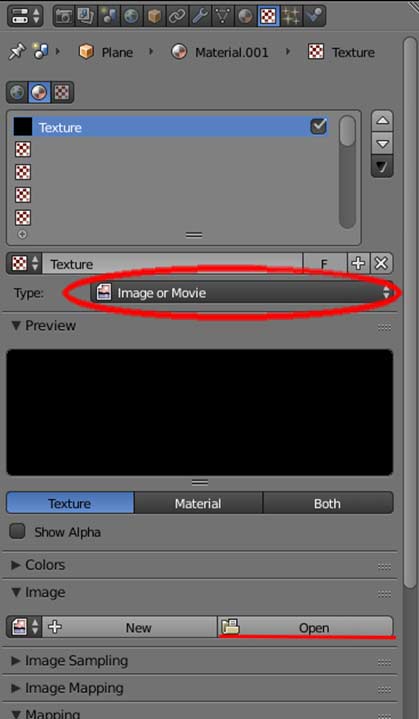
- Press "Open" and choose the file with the source image.
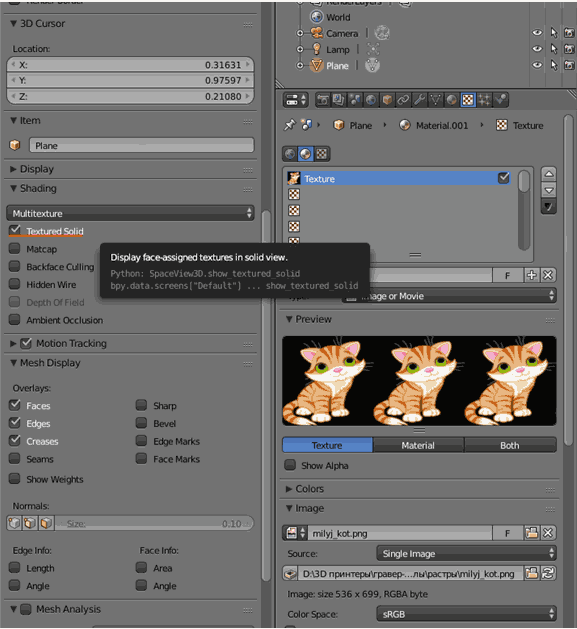
- Select the option "Textured Solid" at the N-panel.
- Add one more window to the Blender nterface (draw the part in the bottom left side of the window).
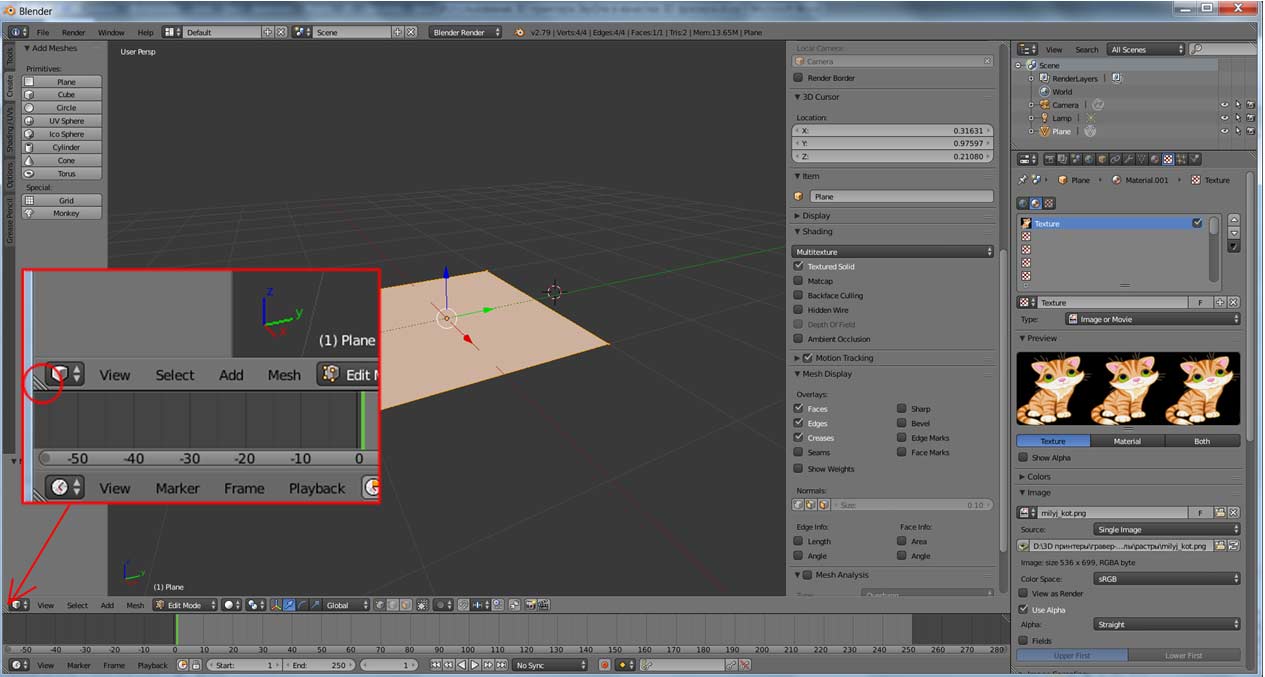
- Switch the mode of the new window to UV/Image editor.
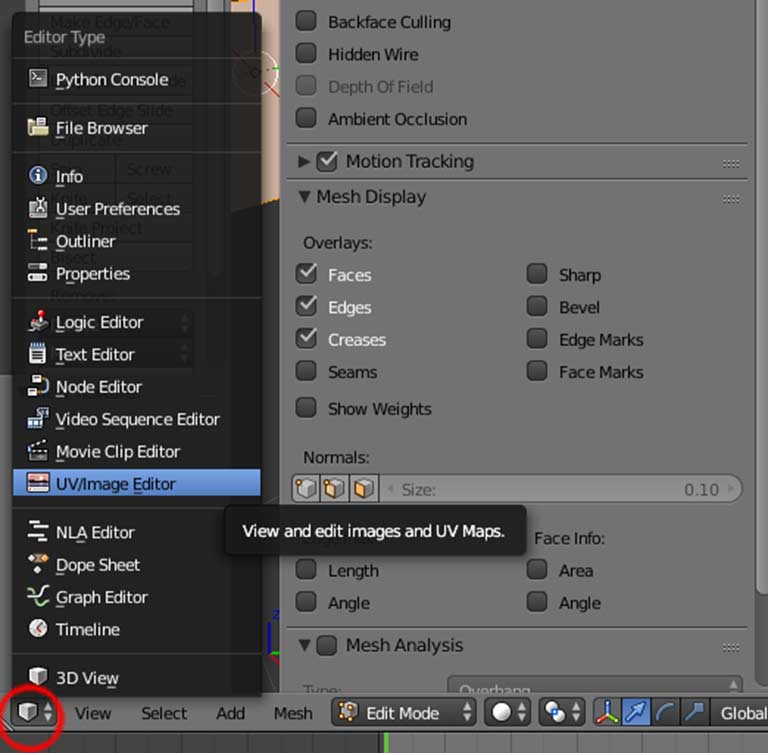
- In the new window choose the same bitmap image ("open file" or press a sign of added images).
Now the image is applied on the flat pattern:

- If necessary, draw the image along axises X-Y. To do it change to Object mode
and press hotkeys: S and then Y - draw the image along Y axis; then S and X - to draw along X axis.

- Select the tab "material"
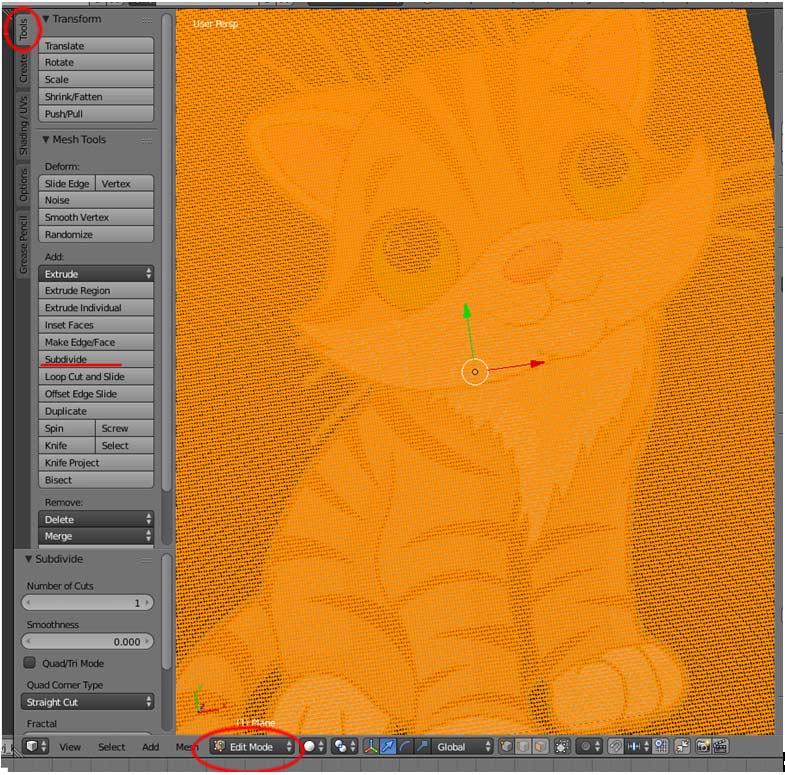
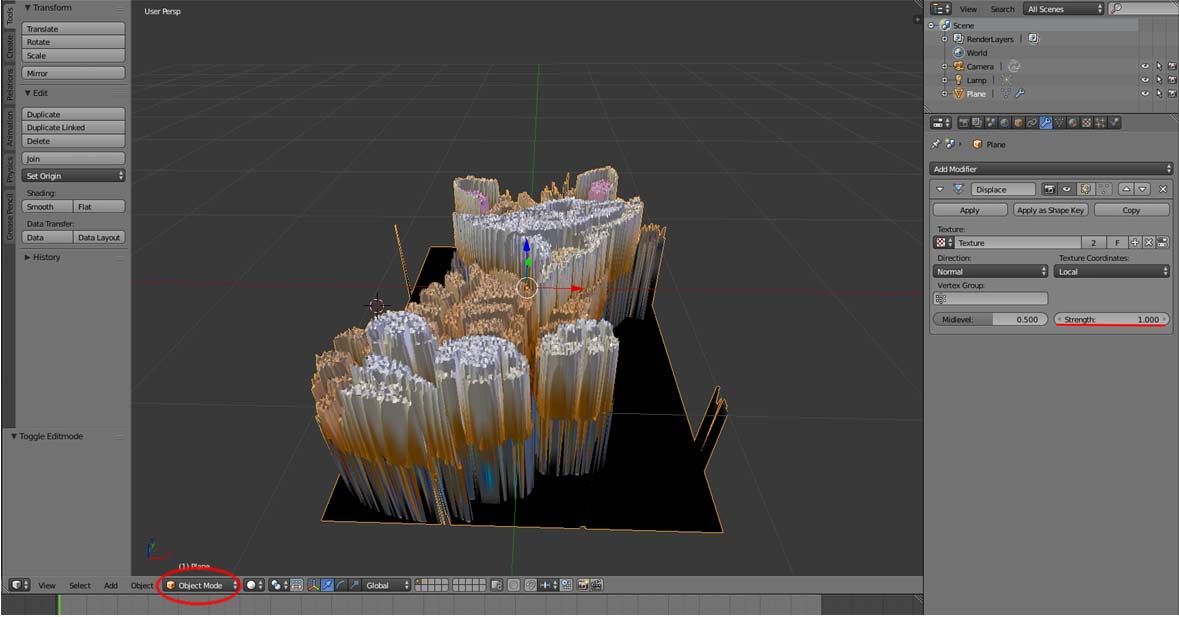
- Divide the surface to many small surfaces. To do it change to Edit mode and press the button "subdivide" on the tools tab few times. Subdivide the surface, until the grid becomes fine enough.
- Choose the tab modifiers
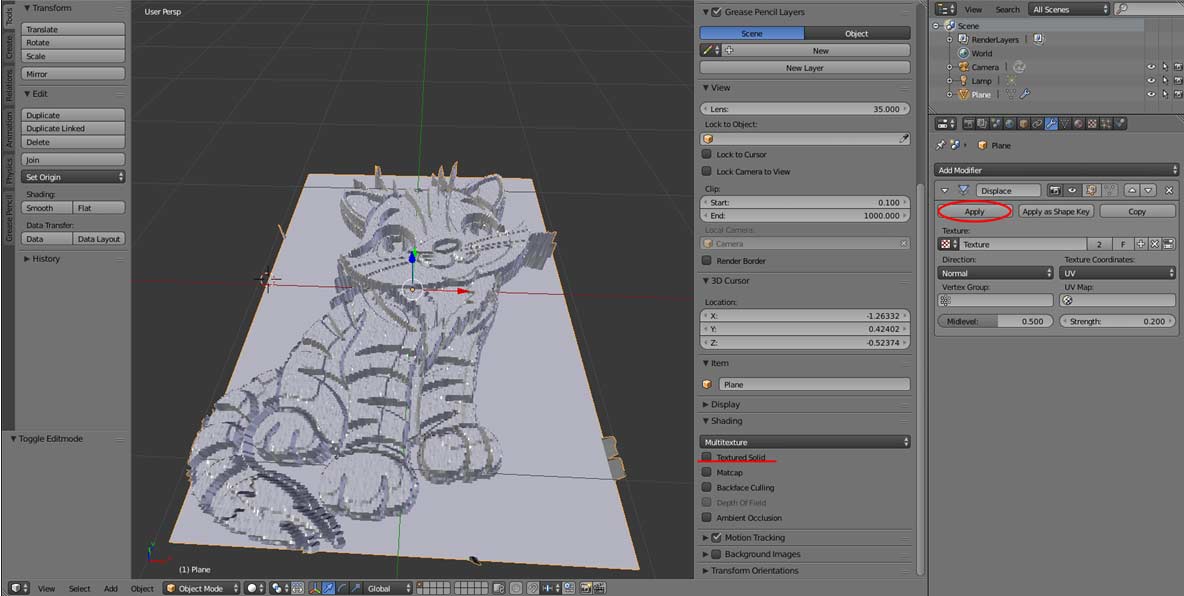
and add a new one – "Add modifier" – "displace".

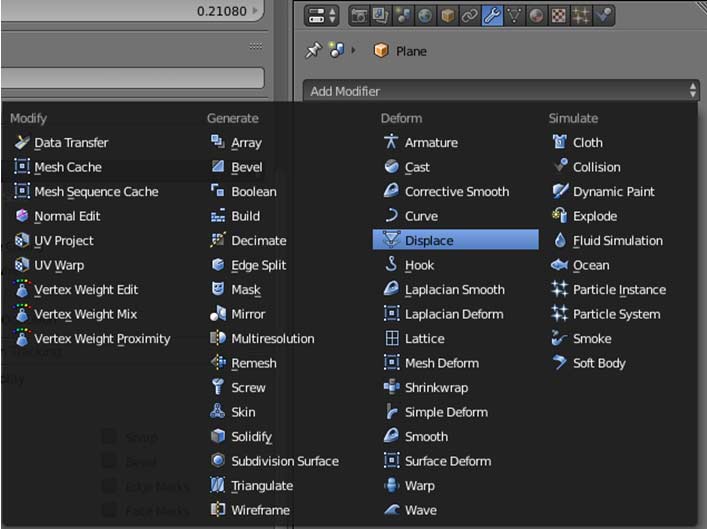
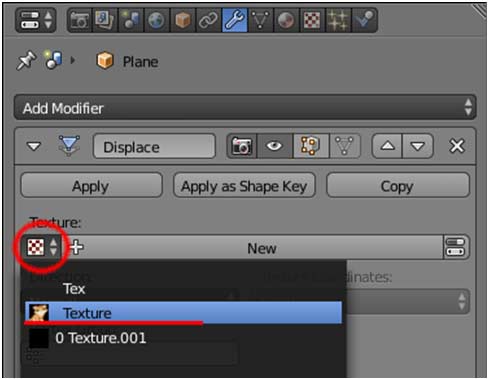
- Then in the field "Texture" below add the texture, which was creates from the image before.
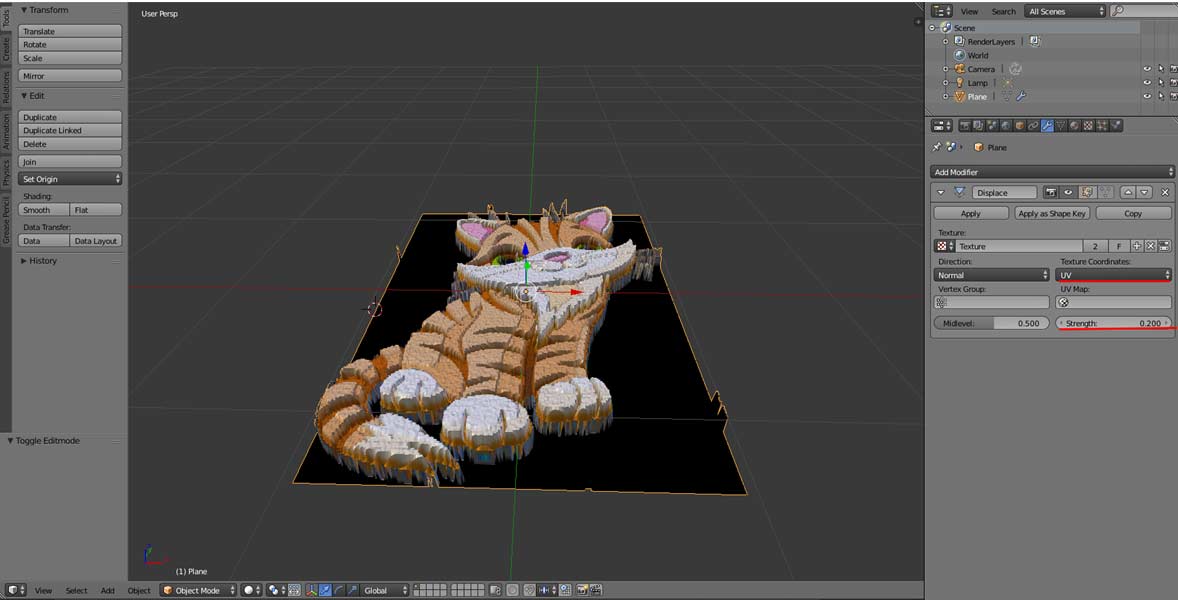
- Change to Object mode. Adjust the field "strength" (decrease the value) such that the image becomes acceptable.
- Set the field " texture coordinates" to UV.
- Turn off the option "Textured Solid" in the "Shading" section at the N-panel.
- If everything is ok, press the button "apply" of the modifier.
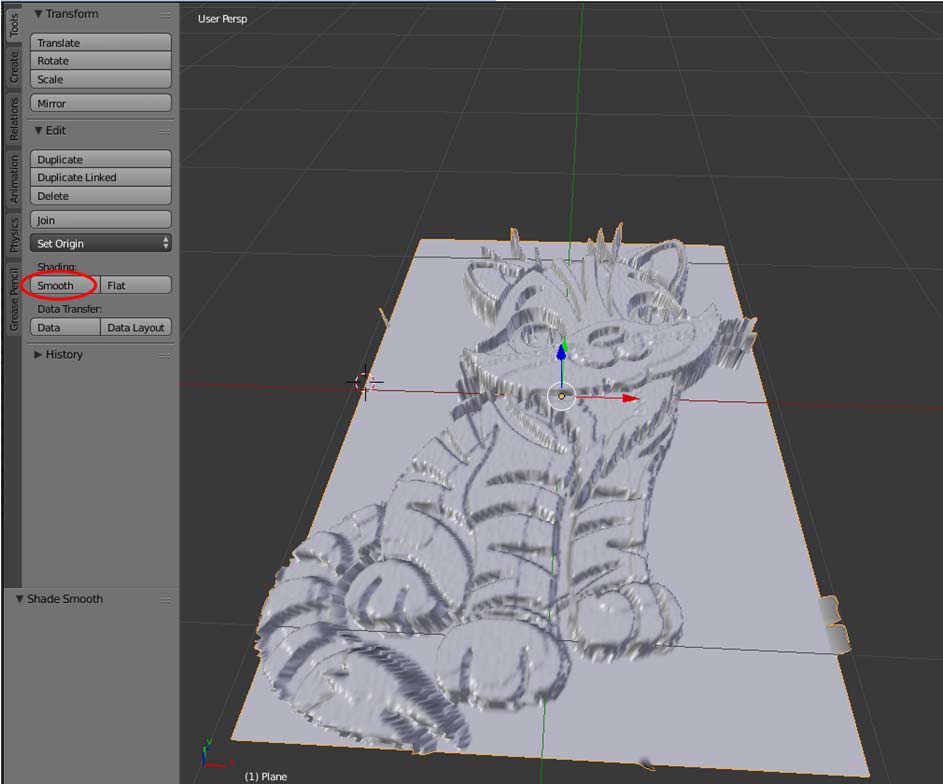
- Press the "smooth" button at the T-panel to smooth the image.
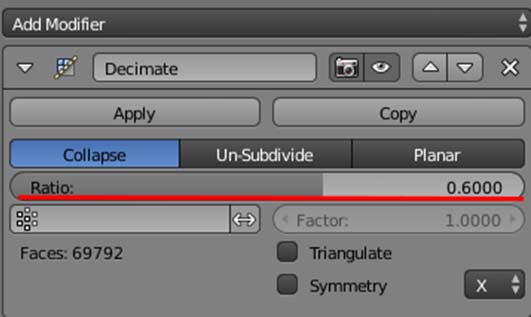
- Apply additionally the modefier "Decimate" if need. This modifier decreases the number of polygones. Decrease the value in the field "ratio" of the modifier till the image keeps acceptable appearance and then press "apply" button.
- Change to Sculpture mode. Turn on "Dyntopo" on the T-panel (tab Tools). Agree to the warning of textures reset.
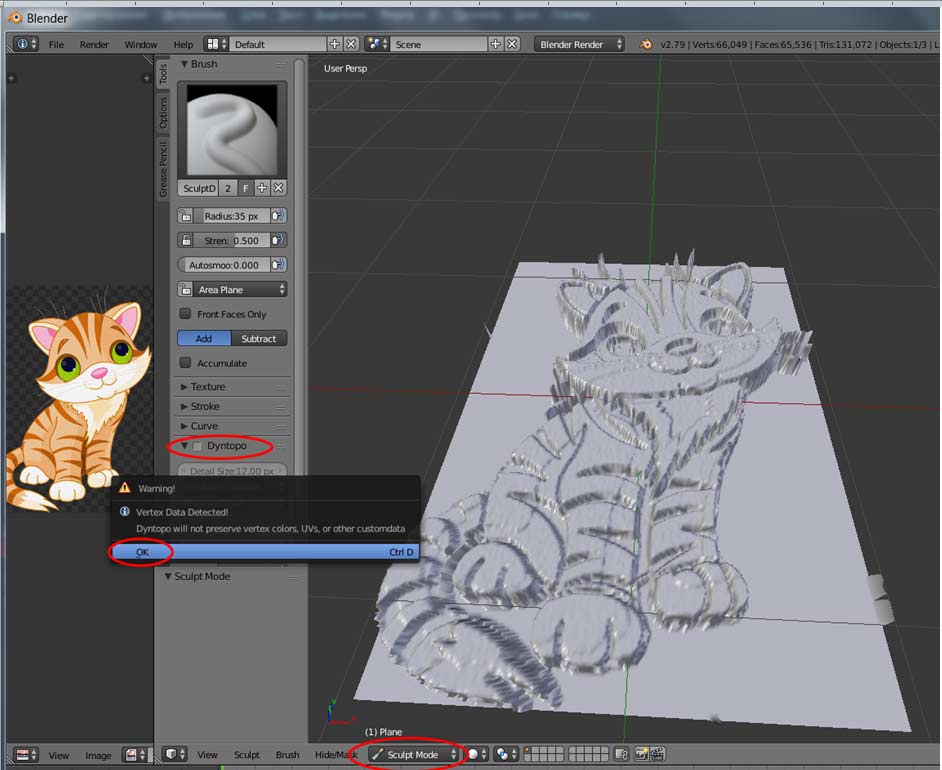
- In the section "Symmetry/Lock" turn off mirroring of a brush.
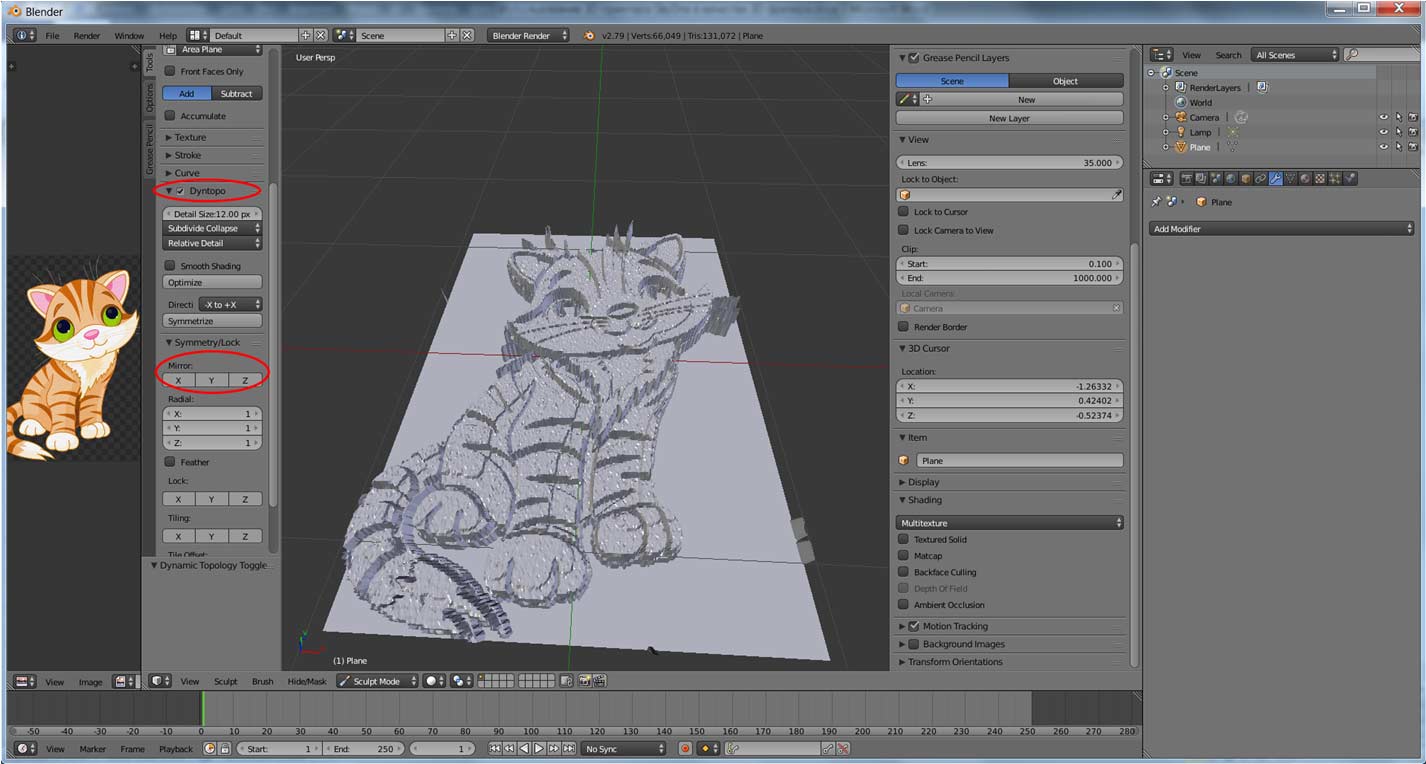
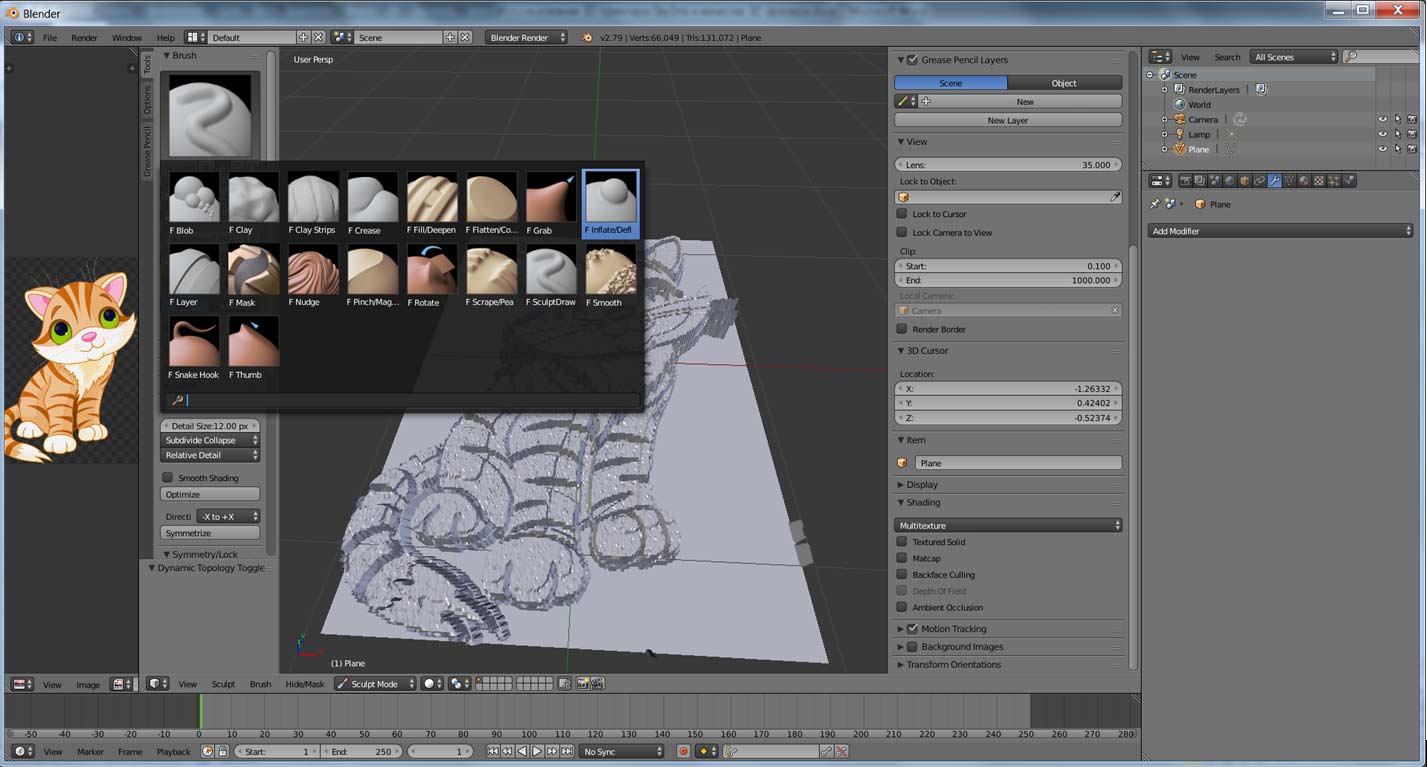
- If necessary, improve the model by brushes till it gets satisfying appearance.
- The ready blend object can be used for g-code generation as it is described in the article "Usage of 3D printer SkyOne as a 3D milling machine".
See also: